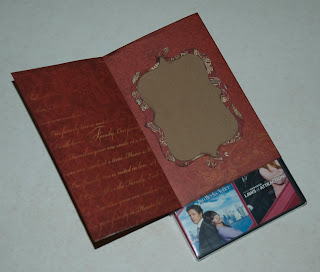
DVD/Card Cover Tutorial (Repost)
I give out quite a few DVD's as gifts for birthdays as well as Christmas. This year, I decided to send a dvd to my grandmother in California. I wanted it to be a little more special than just sending a dvd and a card. So, I came up with this dvd cover and added a card to the front to create a dvd cover and card in one. You can also view this tutorial over at the Fantabulous Cricut blog for their Thurday Tutorial!
Materials
2 pieces of 12x12 pattern paper
Adhesive
Embellishment
DVD
DVD Cover
1. Cut one piece of 12x12 to 7 ¾ x 12
2. Score at: ½”
5 7/8”
6 3/8”
11 ¾”
1. Fold your score lines
2. Add adhesive to back the ¼ fold (or use tape as this will be cover up)
3. Use your DVD box to secure the cover at adhesive line. (this is the point at which you would use tape if you wanted to) Note: this is a tight fit
Cover/Card
1. Cut the other 12x12 paper down to 7 ¾ x 6 ¾
2. Score at: 5”
5 ¼”
5 ¾”
3. Fold at score lines, inwardly
4. Add adhesive from the 5” score line to the shorter end of the paper (5” to back flap) be thorough with your adhesive
5. Attach cover to DVD case. The 5” to the 5 ¼” should be adhered to the front of the DVD cover, this will allow it to open up like a card.
6. Decorate as desired. I used the Storybook Cartridge fore my cover embellishment and for the journaling spot on the inside of the card.
(Note: this is a repost)
I selected this post to be featured on Scrapbooking Blogs. Please visit the site and vote for my blog!


Very Pretty!Great Idea!Love it!
ReplyDelete