Posts

Showing posts with the label Etsy Products

Let's Scrap - Pirates

Image
I love this months sketch from Let's Scrap so much that I used it again to scrapbook our trip into Adventure Land in Disney's Magic Kingdom. I didn't have very many good pictures from the ride itself because the camera on my phone wasn't the best and it was dark in the ride (I have since gotten an I-Phone 8 plus which I think would do a better job). I had two photos that turned out semi ok so I decided to put those on the tags and then just scrap the photos the photographers took outside the ride. It isn't very piratey but I think it turned out cute!  The Sketch:  My Take: To Create this layout I used: Simple Stories: Say Cheese paper pack Simple Stories: Say Cheese II - diecuts Picturesque Cricut Cartridge - tags Blackletter Cricut Cartridge - title font SVGCoop : Esty store - "Dead Men Tell No Tales" and the keys Krinkle Ribbon Distressing Ink Now for a closer look: Thank you so much for stopping ...

Let's Scrap - Indiana Jones

Image
Let's Scrap has a great throw back sketch this week. I love it when they do throw back sketches because all their sketches are amazing! We need to see them more than once right?!!! This was a fun sketch to complete and I think it turned out fun as well! Check it out below! Their Sketch: My Take: To Create this Layout: Cricut Cartridges/Design Space: Gypsy Wanderings - tag (title tag) First Few Years - 2 photo frames (*frame on right layout I used the base layer) Wall Decor & More - film strip Bits & Pieces - banners Rusty - font Miss Kate's Cuttables - Film (rt layout) and fourishes Etsy - Mother Mel - Hollywood Studios title The Paper Studio - Murphy's Square - paper stack Crate Paper: Wonder - Camera, ticket, and & diecuts October Afternoon - All Boy Snap Caps - "Adventure" and "Look at This" diecuts Metal embellishments And now a closer look: Thank you so much for stopping...

Let's Scrap - Brave

Image
It's time for a "blast from the past" sketch over at Let's Scrap . This was a very fun sketch to work with. I did change it up a little bit. I turned the left side of the sketch to the right a bit and worked with the right side as it was. Check it out below: The Sketch: My Take: To Create This Layout I Used: DCWV: The Marquee Stack Recollections: planner stickers - journal words Cricut Cartridges: Disney Princess Dreams Come True - bow and arrow (upper right corner) DC Comics: Batman - targets When I Was a Kid - arrow borders Bits and Pieces - banners Etsy - CheeryDrearyCreations - Brave Dream (Merida) Svg - unknown orgin - bow and arrow Dafont - system font - Viking Normal Thank you so much for stopping by! Blessings,

Summer Love

Image
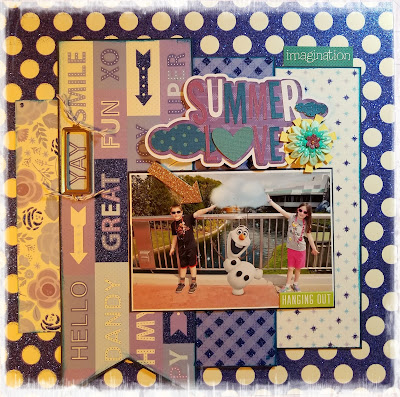
Walt Disney World is full of magical opportunities. When you get your picture taken by the Photographers, sometimes they add a little magic into your pictures. Check out the bit of magic we ran into! I created this layout to go with a challenge at A Cherry on Top . The challenge was to use an arrow, metal of any kind, flowers, papers, and a word title.  To Create this Layout I used: Papers: DCWV - The Marquee Stack Arrow: Mambi Chips Chipboard Sticker - glitter arrow Metal: metal frame from my stash Word Title - Miss Kates Cuttables Twine And now for a closer look! This is another layout I completed for a different challenge within the same forum. To Create this Layout I used: DCWV: Dots, Stripes, and Plaids paper stack Etsy seller SVGCooP - Title and Space Mountain building diecut Cricut Design Space Shapes - stars Me & My Big Ideas - Mambie Chips: Chipboard stickers - arrow & "good times" Me & My Big Ideas -...

Ariel's Under the Sea Adventure

Image
Got some more scrapping done this weekend. I've been working like crazy on my Disney World album and some pages go slower than others. The following layout did take awhile but that is because of all the intricate disney die cuts. Check out the layouts below! To create this Layout I used: DCWV: Violet Leaf  Paper Stack Maya Road: Chipboard covered in washi tape Disney Princess Dreams Come True Cricut Cartridge: Sebastian, Ariel,  Flounder, castle Picturesque Cricut Cartridge: tag Font: Quirky Script Krafty Nook SVG: Little Mermaid Esty Seller SVGCooP: Title InstaScrap: Beauty Puff Stickers - photo corners, glamerous, and arrow Washi Tape And now for a closer look: Thank you so much for stopping by! Blessings,

4 Layouts 2 Pieces of Paper

Image
My biggest challenge in scrapbooking is using double sided pattern paper. Often times I just don't buy it because it is difficult for me to use. I love both sides, so which do I use, or do I have to buy double every time -which sometimes just doesn't work with my "budget". Ha ha, scrapbooking budget - that's funny. Well, my husband doesn't think so - which is very unfortunate, so careful I must be! Well, when it comes to specialty paper that I get for specific projects I like to make it go as far as I can -which normally means saving all sizes of the scraps to use on other pages. In this case I decided to use two pieces of paper to create a double layout. At first I was just going to cut the 4 inches off the bottoms of both and then glue to a white piece of paper to create two full layouts. And then it occurred to me to try and make it so I could scrap a page on all sides of the paper. So, using washi tape I taped the pieces of paper together - running the ...